Thursday, June 30, 2011

Sculpey Slugs

I first did this project with Autumn's 3rd Grade class...(She had the most Awesome teacher)!!
Anyway the kids had so much fun I've continued to make them with the kids in my Parks and Rec. classes.
If your not familiar with Sculpey it is a bake in the oven clay that you can get in most craft stores...I by mine either at Jo Ann's or Michael's...With a COUPON of course!!  :)


Garrets little friend JJ was over last summer so I had him help me make some samples for my class...We had lots of fun!!!

     As you can see its hard to stop once your start making slugs......So here's how we do it...
First roll the clay into a tootsie roll shape...kind-of long and fat.  Pinch or roll the end to make the tail.


Then pinch and shape the eyes...We like to add little beads to make them sparkle...  Push the beads firm into the clay and they will stay put....I have used larger black beads to make spots on their backs too....Use you imagination and what you have around the house..."The only way to do art wrong...is to not do it at all"!! 


JJ's first slug...Lots more to come.  :)

Is that a Pack of Slugs or a Herd???


Of course Garret had to make Sponge Bob.


Autumn made flowers to go with her slugs.


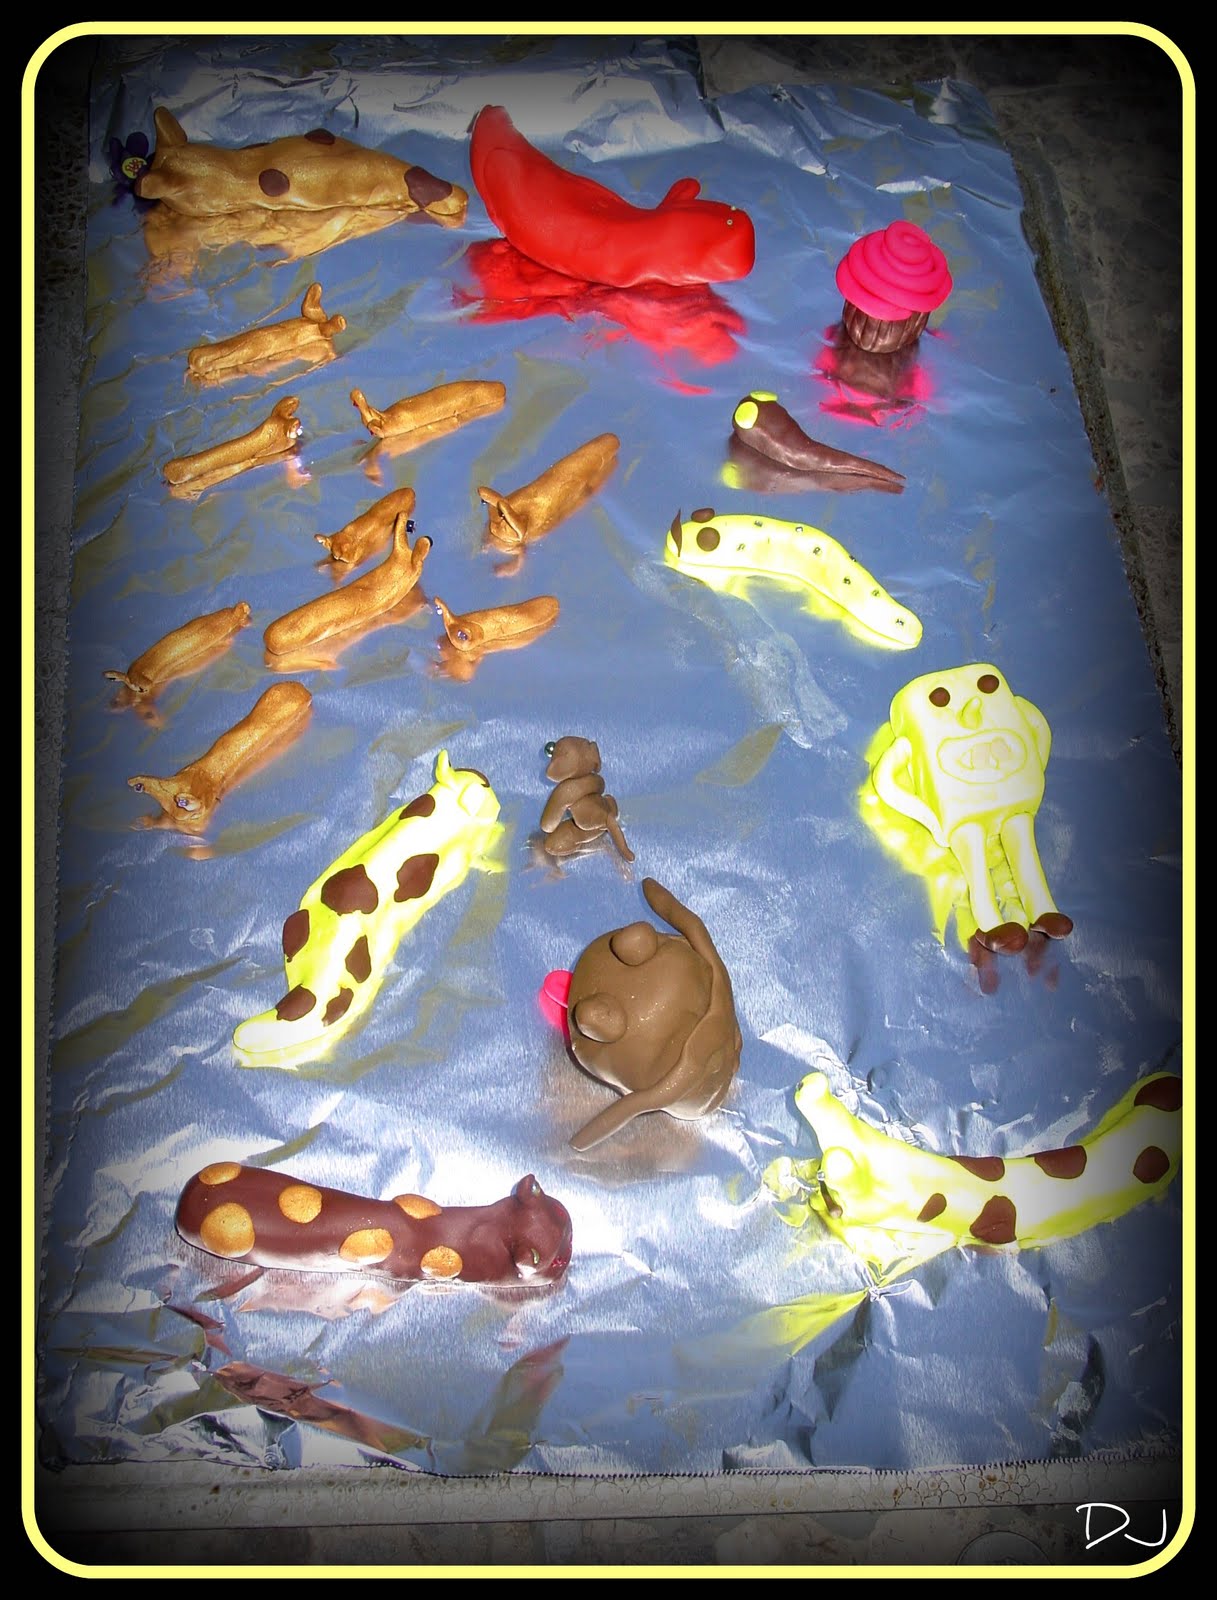
So here is the finished tray ready to bake in the oven...Good times!!  ;)
(Autumn made the Cupcake...Which has also been copied many times over).

Well thanks for visiting and Go Hug A Slug!!!
Denise
PS:  I am linking up to those AWESOME PARTY'S in my side bar...Check them out!!

Wednesday, June 22, 2011

Spray Paint Love

You may not know this about me but I L-O-V-E Spray Paint (So does my son...someday I'll have to share his work)!!!!  :) 


So when I saw this lovely green can of paint a Walmart...Well I just had to by it!!
You see I had this OLD table and chair set that had totally faded from years in the sun and it was in desperate need of a Re-do.


So here's my Before picture.....

 You can see it was in pretty bad shape...The plastic was pitted and the metal rusted.


But after several coats of Krylon's Outdoor paint (4 cans altogether) and a little patience I hate waiting for coats to dry! :)  I am very happy with the results!!


I also bought the new pads for the chairs at Walmart for $9:00....I was going to paint flowers on the solid side but I'm not so sure anymore....


I think they're just fine the way they are....but I do like to paint things!!


Now for some of my past projects....


I was Soooo excited when Krylon came out with their Fusion Paint for Plastics!!!  Suddenly my cheap lawn furniture could match my outdoor palette....Happy Sigh!
The first thing I painted was an old Hunter Green Bench I bought when I was pregnant with Gar...17 years ago...WOW!!  I painted it to match the play house door.....

I later purchased these Pool Chairs at Rite Aid for a VERY reasonable price and painted them in the same Fusion Paint for Plastics... :)
Well... I guess that's it for now....
Go paint something and thanks for visiting!!!
Denise
(I'm linked up to theses "Groovy" Partys) 


NightOwlCrafting


Dragonfly Designs


Beyond The Picket Fence

Somewhat Simple
Furniture Feature Fridays

Wednesday, June 15, 2011

Ruffled Purse

I saw this wonderful ruffled purse years ago and even bought a pattern to try to make one....but never quite got around to it...I also saved an old dress of mine out of the 90's to use for the fabric...but there it sat in my fabric pile.  Until.....I saw Alisa Burke do a fabulous make over on a simple $2.50 raffia bag from Target...Hmmm I thought this would be an easy way to get that bag done!!!  :)

 So here is my "Hippie" Dress although I still liked the fabric...You can see why I put it away a L-O-N-G time ago!!...

The first thing I did was cut down the seams of the different fabric panels.....


I the measured the top of my bag.  (32") I now knew I wanted to about double that to make my ruffle.
I cut my first panel so that it was 4" wide and then sewed a very loose running stitch at the top to gather the fabric.  I pinned it to the top of the bag and then glued it.....EASY!!!
I then added my second and third ruffles gluing them high enough under the top one so the was no straw or raffia was showing.  To cover the unfinished edge at the top of the purse I glued a beaded ribbon.

I already had clear plastic handles left over from my "Felted Bag Stage" (I sold them at craft fairs)... Anyway the idea was to cut the handles off the purse leaving about 2" to run threw the bottom of the new handles securing to the inside of the purse...does that make sense???  (It's past my bed time).   So here it is...
My brand new "Ruffled Purse" made out of an old dress...Total cost was  $2.50...The price of the Target bag....Everything else I had laying around the house....Even the beads around the top...The funny thing is my favorite ribbon of beads weren't quite long enough so I used different beads on the back side.  ;)
Thanks for visiting!
Denise
I Linked up to these Fab link partys...Check them out!
Beyond The Picket Fence
Somewhat Simple


DIY under $5


NightOwlCrafting


Dragonfly Designs

Tuesday, June 7, 2011

Solar Lanterns

I got this inexpensive idea from Peace, Love, 2 Sisters...They made solar lights out of canning jars...Tooo Cute!!!  But I wanted something a little more rustic and "farmy".....


Hmmmm....I thought what about tin cans...They are cheap!!
So I went out and bought several solar lights from Target ( The small one was $2:00 and the larger one was $3:00)


I filled a can with water, then froze it....thinking that it would save it from bending when I drilled the holes in it...That backfired...the ice bent the bottom of the can :(...Oh well it still worked but for the rest I just drilled with no ice and no problems!!!


LOL...No my arms are not that hairy...I took the pictures while my husband drilled.  :)
Using the drill press I first drilled a hole in the bottom of the can for the solar light to rest in.....


I then drilled random holes for the light to shine threw...At night I discovered the more holes the better so I went back and added just a few more!!!  I also drilled holes for the wire and then strung it with beads I had left over from another project.
This is what the look like in the day....

and this at night!
Best of all the cost for two lanterns was only $5:00...but of course I plan to make more...I think they would look nice hanging on the fence around the pool!!

I'm linking up to these Fabulous Party's:

DIY under $5


NightOwlCrafting


Dragonfly Designs

Beyond The Picket Fence


Party Button

Join  us Saturdays at tatertotsandjello.com for the weekend wrap 
 up           party!


LinkWithin

Related Posts with Thumbnails

Autumn

Autumn
Autumn modeling a hat I knit for my etsy shop...What energy!!