Thursday, March 29, 2012

Kids Art: Spray Painting Spring

Oh-wouldn't it be great if we could just open a can of spray paint and spray out SPRING???  We could use some of that around here...It's been RAINY and WINDY.

Anyway that's just what my art kids did...They Spray painted Spring...
And I have to say this was one of our favorite projects!!!


I got the idea when I was going through Garret's sketch book...He does graffiti art and one of his favorite "doodles" is a hand holding a can of spray paint.  He usually has his name coming out of it... in all sorts of creative ways.


SOOO...


I thought...what if...I have him do a directed draw and have the kids draw their version of what they love about SPRING Spraying out of the can.


Great idea, huh?


Garret giving the directed draw...the kids loved his sketch book!

Garret always does a wonderful job teaching the younger kids and I think it's so good for the boys to see that drawing is cool at all ages (they adore Garret)!!  Of course he IS pretty AWESOME!!  :)


We discussed how, when paint comes out of the can the spray gets wider the further it goes from the can


OK...So Joey's doesn't really say spring...It does say Joey!!  :)
Notice how he copied Garret's Skull and Crossbones?


The kids all designed their paint can labels differently!?  Such talent!!
This would be a fun project to do for any season or holiday!!
Give it a try (if you do, I would love to hear how it turned out)!!

As always I will be linking up to many of the link parties on my side bar.

But most of all thanks for stopping by!!
Denise

Monday, March 19, 2012

From Thirftshop Mirror to Chalkboard Diva DIY

Happy first day of Spring everyone!!!  I hope yours is filled with sunshine!!  Here, in my little town of Poulsbo the weather has been FAR from spring like...We have had snow on and off for the last two weeks...YIKES!! 

Oh well...When the weather is crummy the thrifty go shopping.  :)
And shopping I did....I have been looking for a mirror to transform into a chalkboard ever since last summer (Summer-Ahhh...I can almost feel the sun on my skin...) anyway I finally came across the perfect one at the GW for only $6.00...(Happy Dance).


It was painted this BRIGHT RED...and had flower stickers on it (which came off quite easily) and had the most lovely shape.  So....


The first thing I did was cover the mirror with paper and painted the wood with KRYLON's Dual Paint plus Primer in Ivory (my new favorite spray paint...I used it on my bowling balls too...but that's another post :)
I gave it 3 or 4 light coats...can't remember for sure but you know the drill...several light coats is better than one thick one.
I let it dry for a about a week (because I never got back to it)...


Carefully  taped the freshly painted wood and sprayed on the chalkboard paint...again doing several light coats.

I sanded the edges to let the red show through and...


Added the metal hose clamp to hold the jars for the chalk.....Which is really cool because you can change it's size to fit different


containers with a simple screw driver.  :)
 I used two different size jelly jars to hold my Chalk and my Chalk Pens.


I also added two cute little bird hooks that I got at World Market for only $1.50 each....What a deal!!!


The chalk markers are fun and bright but they need to be washed off and they do leave a mark, even after erased.

I haven't deiced where to hang it yet...or if I will sell it down at the space I'm considering leasing..(Shh don't tell anyone...I haven't deiced for sure yet...but it does sound like fun and you know I LOVE retail!!).

Anyway..know what else is fun???!?
Link parties!!!
And as usual, I will be linking up to many of them on my side bar.  :)

HAPPY SPRING EVERYONE!
Denise 

Sunday, March 11, 2012

Peep Wreath.......

The other Sunday one of my favorite moms from my preschool class  showed me a wreath she made out of Peeps...It was so stinking cute...I knew I had to make one for my Autumn (She just loves Peeps but being a diabetic chooses not to indulge herself...Well at least not most the time)....


Cindy explained to me how she used tooth picks to attach the little bids to a straw wreath...
and, although the straw wreath was kind-of messy...The project was really quick and easy!


Sooo...Being the thinker that I am I deiced to pick up a Styrofoam wreath and skip the mess....Makes sense doesn't it??


Well Here's the thing....You put a bunch of those marshmallow birds together and believe it or not they get kind- of  HEAVY!!

Ya...I mean real heavy!!  I hung my pretty wreath on the wall and proceeded to make a flower for it...when I heard this odd R-I-P.
I honestly thought the dog had farted passed gas (she had been having a little problem with that, as of late) Anyway I even went over to make sure she was OK...after all it was louder than usual....Then I went back to making my Tissue Paper flower when I heard it again...this time followed by a thump...
Of course this time I found my wreath on broken and on the floor.  :( 


I put it back together and deiced to use it as a center piece instead (Not like I really had an option).... 


Well, that's my whole peepin story...And the moral of it is what????
Yes, use a straw wreath...There really is less mess in the long run!!  :)

Yet again, I'm linking up to some way cool parties!
Thanks for stopping by!
Denise

Tuesday, March 6, 2012

Kids Art: Clay Heads..(or pot heads as I like to call them)

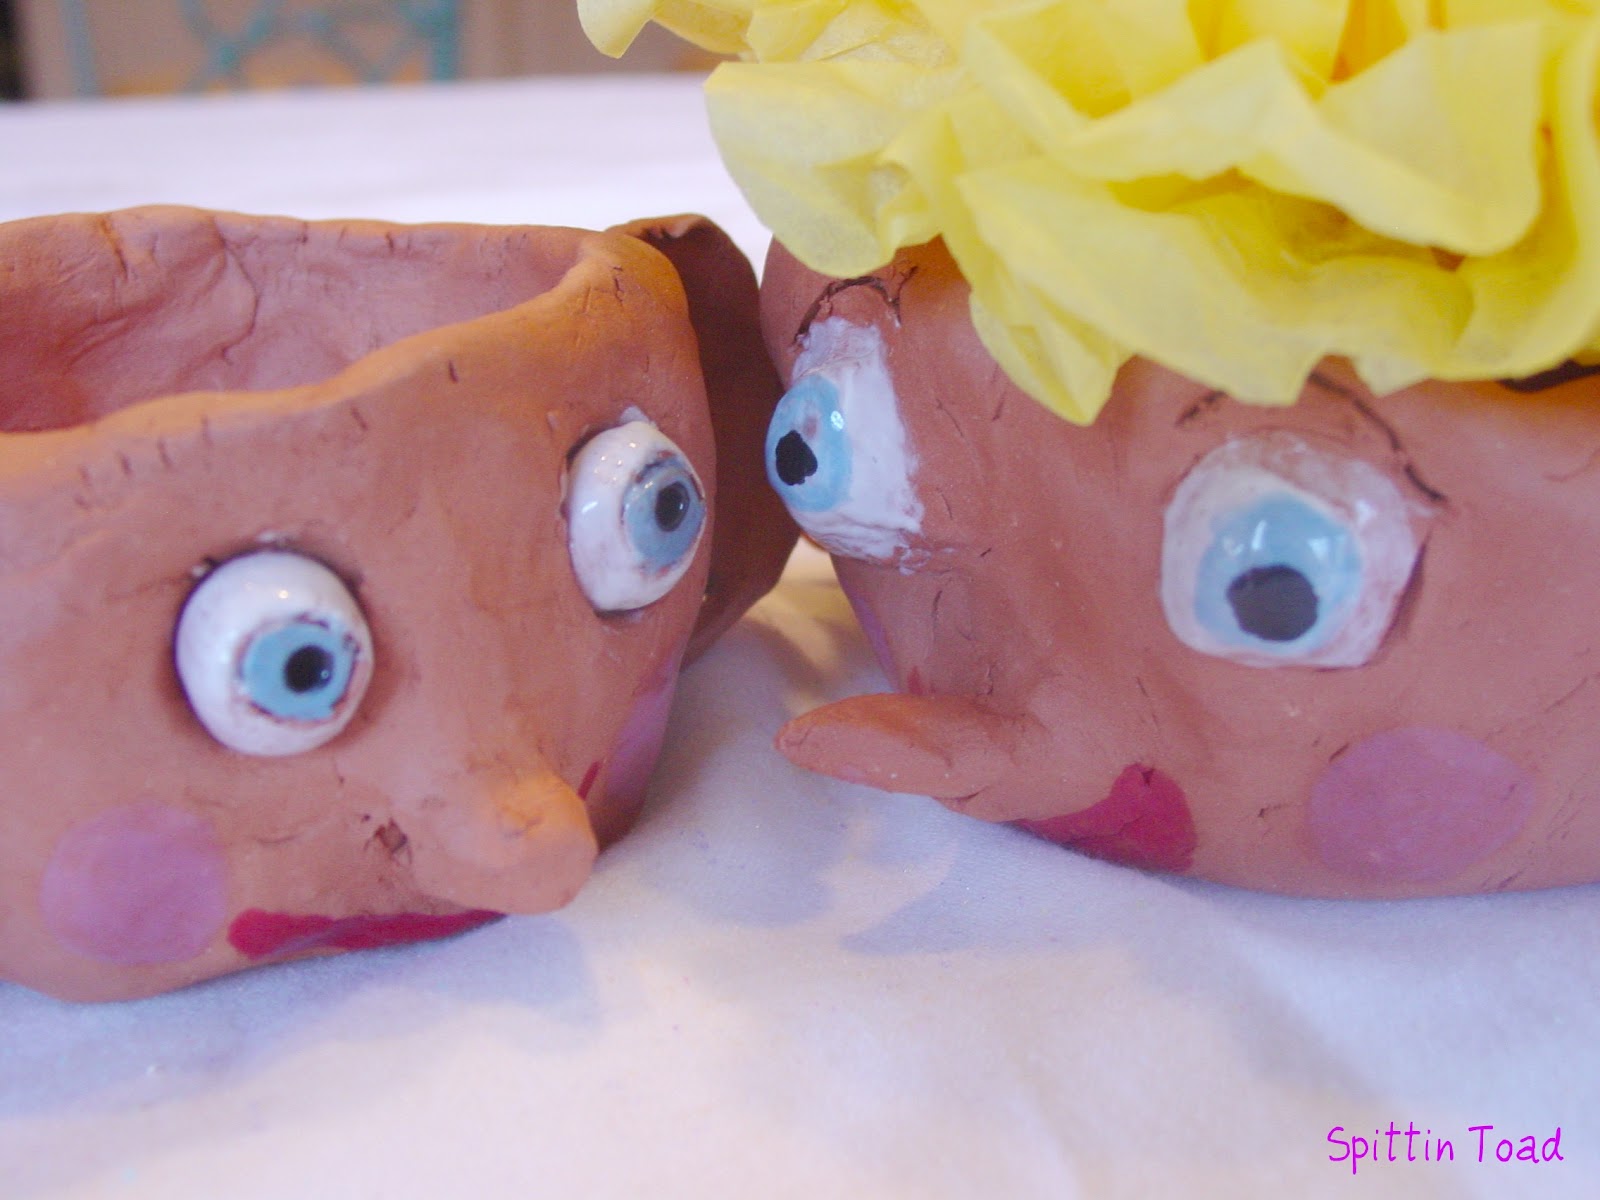
Just thought I'd share with you a couple darling "Pot Heads" created in my after school art class...


They are made from a simple pinch pot using terra-cotta clay.


I think the hardest part is convincing the kids to keep it simple and just paint the features on the face...


the eyes, cheeks and mouth....


These kids did just that and the results are darling!!!


My plan is to have them plant the heads with grass seed so the can cut the "hair"...
but I think the tissue paper flower looks mighty fine!

I also have some darling pigs and a couple of cute puppy's to share...
so check back later.  :)

Take care!!!
Denise

As usual I will be linking up to the parties in my side bar.

Monday, February 27, 2012

Knitted Neck Warmer Pattern


I just realized how long it has been sense I've posted any knitting...(Probably because I haven't had much time to knit)...  :(
Anyway, I thought I would share my pattern for a VERY Easy Neck Warmer....


Because this is the pattern I use for my beginner knitters the instructions are for Garter Stitch (Knit every row) but it looks lovely in both Stockinette and my favorite a Basket Stitch.
You can make it as thick or thin as you like just by casting on more or less stitches...It really is simple!


DENISE’S SIMPLE NECK WARMER:

 
This neck warmer is so easy and yet so well received you’ll want to make one for every one you know!


MATERIALS:


1 skein Heavy worsted or Bulky weight yarn…I love Sensations, ANGEL HAIR it’s inexpensive and oh so soft!! (I get it at Joann’s but they don’t always have).


1 size 10 (US) circular needles

 
CAST ON 15 STITCHES


Knit every row until piece measures 24” or desired length.


TO MAKE RUFFLE:


In the next row loosely knit into the front and the back of every stitch


Turn and repeat for next row


Bind off


I put decorative buttons on the outside and then sew small buttons under them (these can slip through the knitted fabric so you don't have to make button holes)...This way you can adjust the fit of your neck warmer and change the way you wear it.

The other option is to make a pin to match...again this gives you he opportunity to wear your neck warmer
in several different ways.

Give it a try...I bet you can't make just one!!!
Thanks for visiting!
Denise
PS:  I will be linking up to many of the parties on my side bar.  :)

Tuesday, February 21, 2012

Thrifty Finds

Life has been CRA-A-A-ZY, so I have no new projects to show you...
BUT
I do have some fun "thrifty finds"!!!


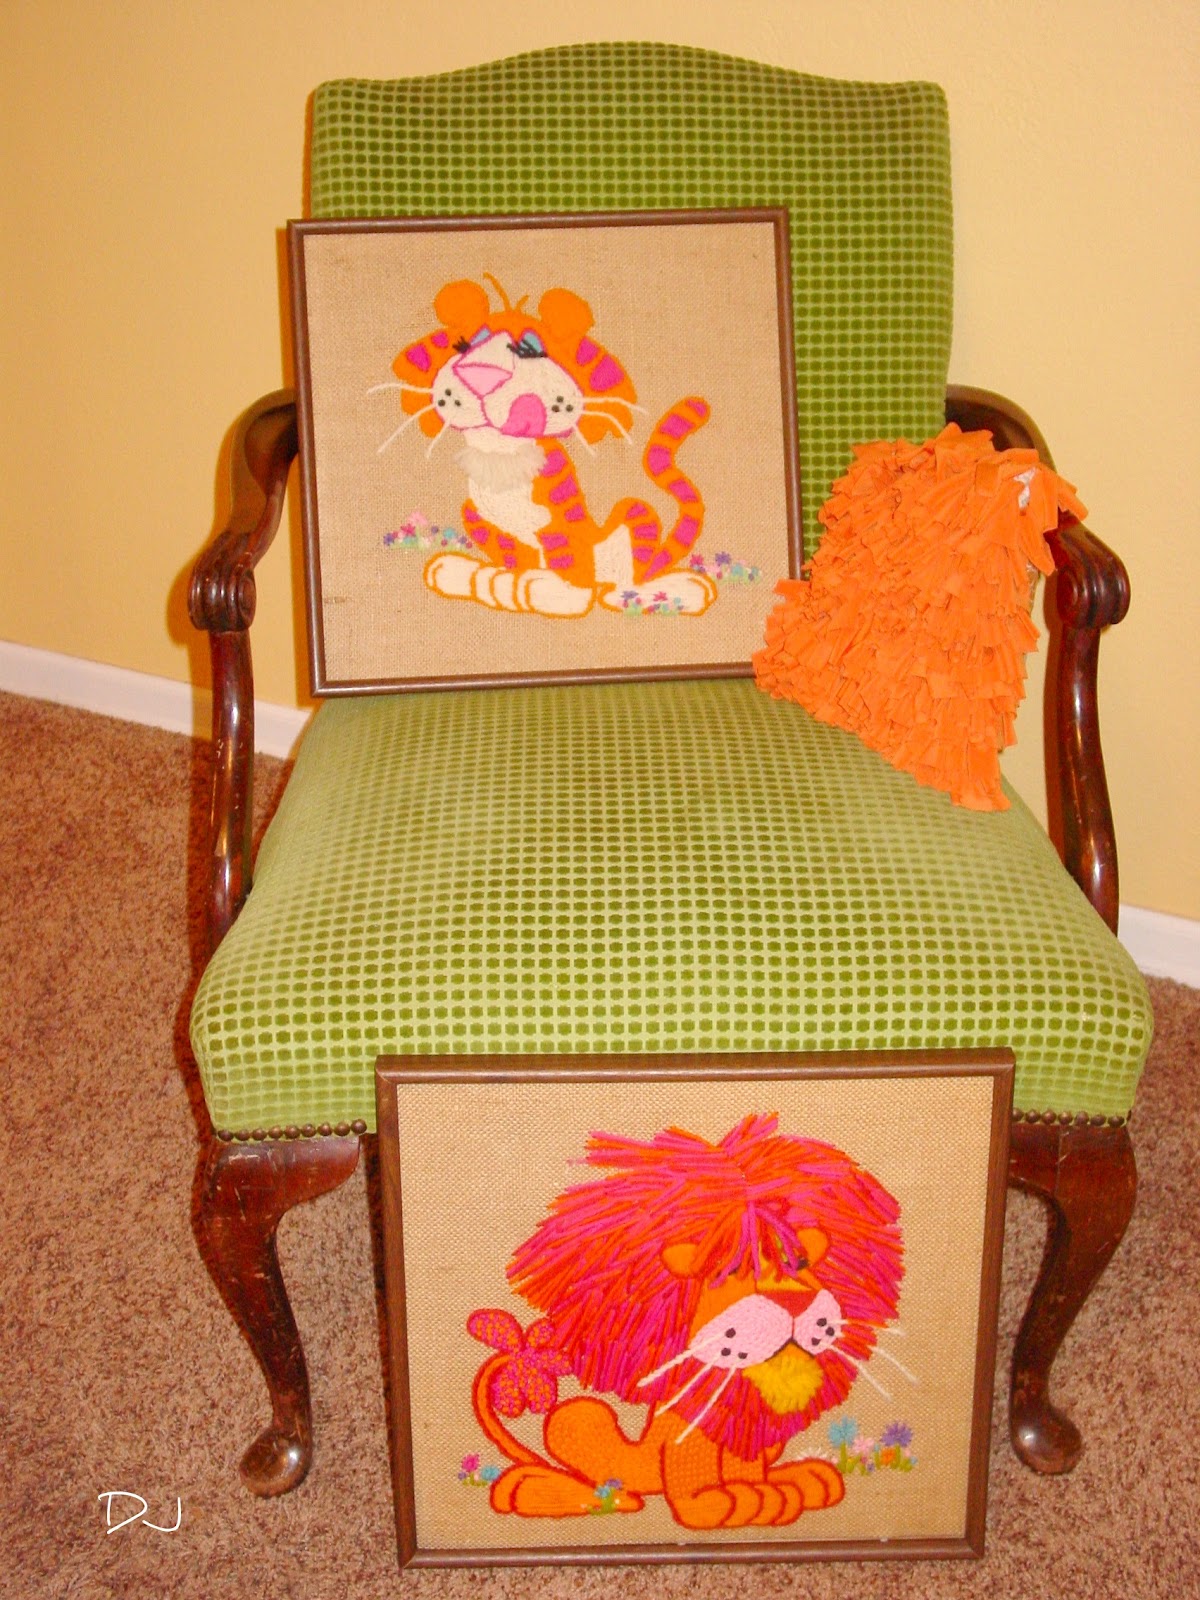
I found these two AWESOME pink and ornage sticherys my local GW for 1.99 each and just couldn't pass them up (I might be a little out of control).....


but they are sooo cute and I just love the color combination!!!


Not to mention the darling expressions on the faces of these two "Kittys"

I also picked up this....


Mid-Century Modern Stereo Cabinet....

I wan't sure what to do with it untill I saw this "LOVELY".. by Jill at Weathered Pieces
What a great idea to leave the doors off and put a shelf in the middle...
I can't wait to get started!! 

                       Last....but not least I got these Bad Boys in Seattle for only $11.79...
Ya-baby thats what I said...$11.79 and they're Python Too!!


Nice huh!!

(The only problem is they are a size mens 7 and don't fit any of us)
Maybe I'll sell them on e-bay.
Well that is it for this week but do check back and see how my Stereo Cabnit turns out!!!

I have a few other goodies "up my sleave" too...Just need the time to do them!!
I will be hooking up to some of the parties on my side bar so please check them out and don't forget to stop by Weathered Pieces ...Tell her Denise sent you.  :)

Tuesday, February 14, 2012

Kids Art: Painter's Tape Tree

Here's another fun project I did with my after school art class.  For the month of February we did a study on trees and this was my kids very favorite project....

Interesting enough it was also the lesson that they had the hardest time understanding the concept, at least at the beginning (mostly the younger ones)....The Tape is used as a "resist" to keep the water color off or away from the paper

So here is the lesson plan....


Like the tree of hearts we started out discussing the shapes of trees...


How the are larger at the base of the trunk and get smaller at the top and that the branches do the same...they are larger where they are connected to the tree and get smaller as the grow outwards.
( a tough thing to do when your tearing tape to make a branch)
anyway...


We looked at how at the end of a branch you can often see the Y shaped.
(The top two trees are good examples of this) 


I then gave them a piece of watercolor paper and some tape...showing them how to tear the tape to make the tree...(I did a step by step example for them in the front of the class)...

Some of the kids needed a little help getting started and even along the way....
but they did an awesome job!!!

We started with the trunk and the large branches (I suggested 3 large branches) and then used the left over tape for the smaller ones.


The next step is to paint the whole piece of paper (including the tree) using watercolors...
I let them choose their colors but suggested they do a night time scene with a moon or maybe a sunset...


For the moon I asked them to put it in the branches (so that when the tape comes off, it looks like the moon is behind the tree)...NICE!


My plan was to take the tape off after the paper was dry but the kids couldn't wait....so as long as there wasn't "puddles" still sitting on the paper we took it off without a hitch....
Some of the kids did have a problem with the paint running under their trees.
(Possibly the tape wasn't pressed down hard enough or they used to much water)


My easy fix was wait till next week and then paint the tree.  :)
(You've gotta LOVE the MOON on this one)

Well that's it...Go ahead and give it a try it was sooo fun!!!

I will be linking up to many of the parties on my side bar...check them out!!!
and as always...
Have a great week!!
Denise

LinkWithin

Related Posts with Thumbnails

Autumn

Autumn
Autumn modeling a hat I knit for my etsy shop...What energy!!