Finally...Here it is my..... recipe for BATIK...
I've been wanting to share this for SOOOO LONG but I was waiting for my Summer Art Class to start up so I could get pictures of all the steps along the way.
 |
| Cute Puppy Dog with Bone |
Let me start with just a little history behind this project....
My son was studying Africa in his 3rd grade class and I was the Art Docent (At his school an Art docent was a volunteer that came in, gave art history lesson and the usually did a project along with it)....I was never very good at the history lesson, but I sure had fun with the art part...
Anyway I always tried to pull the lesson in with what they were studying...which is where the Batik project came in.
 |
| Cool Abstract Design! |
The kids enjoyed it so much...That I have done it ever since!!
(Not to mention the finished project got rave reviews from the parents)!
I should also add that the melting wax...Hmmm shall we say... kind of smells...We had the Principle along with many of the teachers poking their heads in to see what we were up too. :)
So here we go:
First of all, I purchased muslin fabric, washed, dried, and then cut it into rectangles...(mine were 15" X12" ).
For the School project the kids had to draw African animals...but for my summer classes they get to draw what ever they want...The only criteria is that The drawing has to be LARGE...When your painting with wax its hard to do paint fine details and thin lines!!!
I mix my own wax using a 50/50 mix of bees wax and paraffin wax. (The bees wax absorbs better into the fabric..but the paraffin dries harder..making it crackle better when you ball up your project before dyeing it).
We add crayons to color the clear wax and of course the kids get to choose their colors...I melt them on two griddles using cup cake tins to hold the wax....
You want the wax to be hot enough or liquid enough to soak though the fabric...
Have the kids paint the smallest parts first...like the eyes...dots on the butterflies etc...Once the fabric has absorbed the wax anything painted on top of it wont show after you iron out the wax.
The other thing to remember is ... they have to move fast...dip the brush and then quickly get it to the fabric!
Drips of wax happen...That's OK it just adds to the "Batik Feel"!
When they have finished the front, have them turn it over and paint any places the wax didn't go through on the back.
I don't think I mentioned that I usually do this as a three day project:
The first day we design our pictures starting out on paper and then moving to the fabric.
Day two is of course painting with wax and....
Day three we dye!!
My favorite dye bath is black...I just like the way it makes the colors pop...with that being said I also offer the kids one or two other colors depending on what they painted.
I think one of the hardest part of this whole process is scrunching up that beautiful wax painting to put it in the dye bath...but they all do it!!! :)
 |
| Art work in a black dye bath. |
 |
| Nicely Scrunched!! |
I then go home and iron out the wax using an OLD iron (that I just use for crafting) and paper towels..
So here are some more of the finished Batiks....
 |
| Handsome Raccoon |
 |
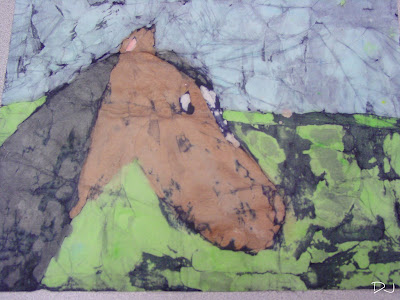
| Lovely Pony |
Some of the kids choose not to paint the whole fabric piece in wax...This is just fine but it does leave a waxy outline or shadow around the picture.
The kids who do cover all of the fabric get a more conventional Batik look.
 |
| This Rat is one of my faves...I don't think my picture does it justice! |
 |
| Yummy Cupcake! |
So there it is in a "Nut Shell" ...Easy...Messy... Fabulously Fun...Batik!
Give it a try at home and then just maybe...just maybe... at one of your kids, grand kids, neighbor's kids...(you get the idea) School! :)
I will be linking up to many of those Awesome Link Party's in my side bar...
Check them out they are so full of great ideas!!!
And once again...
Thanks for visiting!!!
Denise


This is such a great idea!!! I am visiting from Dragonfly Designs and I am your newest follower!! I hope you have a great day and I see you around soon!!
ReplyDeleteMichelle
www.delicateconstruction.blogspot.com
Love this! This was one of my favorite activities that I made in art class back when I was in school. I got to make 2 of them and I still have both of them to this day :)
ReplyDeleteThe kids you teach art to must have the best time with your projects, Denise. I know I would! ;)
ReplyDeleteThanks for linking to the party again. Keep those creative ideas comin' each week.
Liz @ the Brambleberry Cottage
http://thebrambleberrycottage.blogspot.com/
Love this! I love to give children full control over their projects. Yours show how much fun they had. I will be following you :-)
ReplyDeleteSmiles, Alice
These turned out great, bet the had a blast.
ReplyDeleteI just found your cute blog and wanted to invite you to my weekly any link goes party at Bacon Time. I am even giving away a cute pair of fork silver earrings to one lucky linker this weekend. Hope you will join us.
http://bacontimewiththehungryhypo.blogspot.com/2011/08/party-mindie-style-any-linky-goes-10.html