Showing posts with label valentines. Show all posts

Saturday, February 6, 2016

Hello Friends

Good morning friends, I have missed you all!!  My last blog post was July 2015....YIKES

A lot has happened since then that has kept me away form my blog and much crafting...
it's all good of course...except for the part about not blogging and crafting...I had know idea how much I would miss this little blog and my handful of friends.

So whats going on you might ask?

It's not that I have exciting news or that it's any kind of a big of a deal but I am now managing a little floral shop (I'm not allowed to say where) but between working full time, my daughters senior year in high school and her club volleyball travels, well there just isn't much time left in the day....

BUT DANG IT ALL...I WILL FIND TIME!

So there it is...my commitment to you ...well mostly to me...

Put out one post a week even if it's just a lovely bouquet or flowers..

Like this one for Molly (love that girl)...Purple and Gold for NK Senior Night.... 


GO VIKINGS!!

So hopefully you all will join me on my new adventure as a fledgling florist and an almost empty nester.

There will be more flowers post than ever before...but who doesn't like flowers?

I plan on finishing my 1960's trailer this summer so you might want to stayed tuned for that...Here's a sneak peek...


And of course I will continue to share my hand stitching...


And Jewelry making...


And lets not forget farm life...


 So there it is...I guess I have more to blog about than I thought...

Looking forward to reconnecting with all of you!!

God Bless and thanks for stopping by,

Denise

Wednesday, February 4, 2015

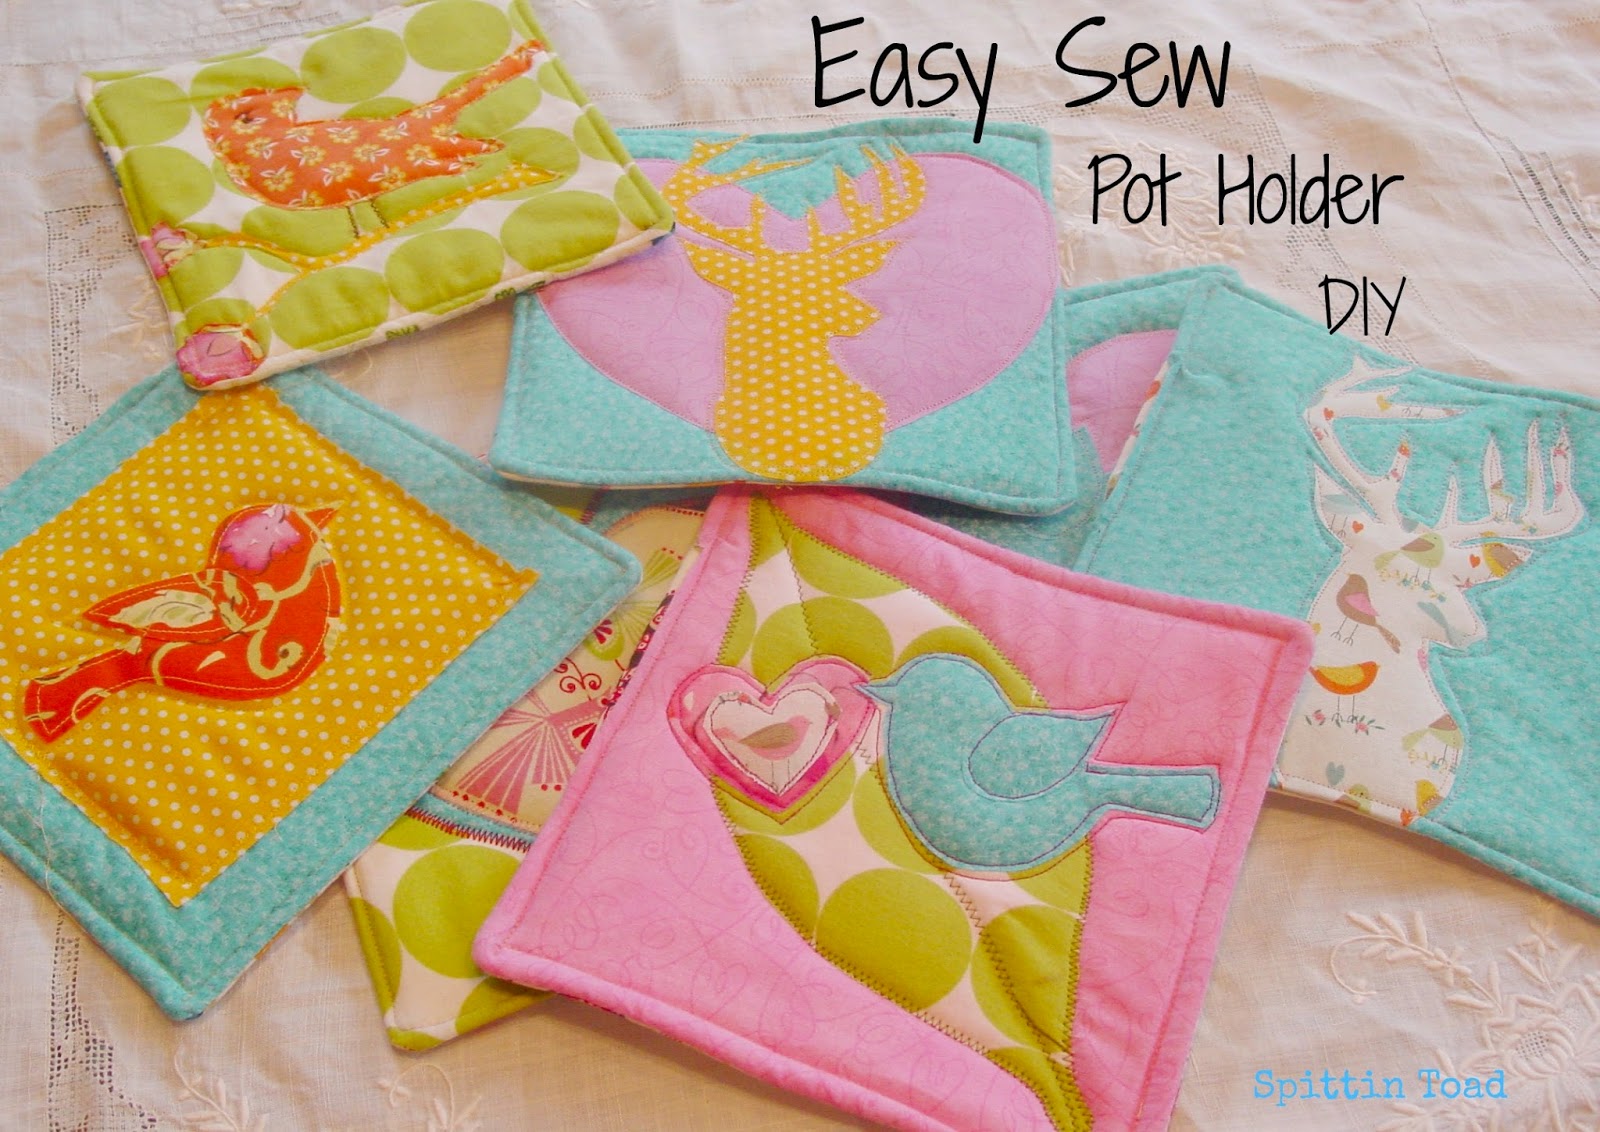
Easy Sew Pot Holders for Valentines and A Give Away

I went to the fabric store the other day just wanting some spring fabric...I wasn't even sure what I was going to do with it...maybe I would make a banner or pendant maybe some pot holders...maybe????
I just needed spring!!! With all my Christmas decorations down and no hope of snow (it's been so warm here in the Pacific Northwest) my house and myself were feeling a bit dreary.


So I bought some "Happy Fabric" and decided to make pot holders (or do you call them hot pads?) for my friends for Valentines Day.  (Let me just say right now ...what a stupid idea!  They may be easy but they are a bit time consuming).


After washing the fabric I cut out a bunch of squares 8" x 8".

I laid  them out on my table to determine what pieces I wanted to put together.


I did an applique on one side and the left the other side plain...I had way to much fun putting the different fabric together!!!  I think that's my favorite part!


Using an iron on adhesive made the appliques easy...You just iron the adhesive to the wrong side of your fabric and then draw your design on the paper side...cut it out, peel the paper off, flip it over and iron it to the right side of your pot holder.


I laid my design out first before ironing....
In this case I sewed just the leaf on first and then ironed on the bird and the heart...


 Before stitching over the rest of the applique, I layered and sewed the pot holder together.

Here's how I did it..


I put two layers of my insulation fabric down (I like my pot holders thick.), then with the right side up I put the first fabric square on and then the 2nd one goes right side down...so that the the fabrics are right sides together and the padding is sitting under them. 


Then sew all around the square with an 1/2" seam allowance leaving about a 3 inch opening on one side to turn the square inside out...don't forget to trim the corners and excess seam allowance before you flip it.


Then sew around the edges and sew your applique on too.


I made these bright little birdies for my kitchen...


 And Guess What...


I made this set for YOU!!!!!


YUP...That's right...I'm giving away a pair of my hot pads to one lucky reader...

Okay, so it's not the lottery, but I do want to say thank you to all my faithful followers.  :)

I really do appreciate you always stopping by and it makes my heart goes thump thump when you leave a comment!!!

So this is my Valentine gift to you (well at least one of you).

Just leave me a comment and I will put you in the drawing for the hot pads and if your not following I would love it if you would!!! I have a ton of projects to share this year.  :)

I will put all the names in a hat and have one of the kids draw it a week from today....

Wed, February 11, 2015

Denise

And of course iIwill be linking up to many of the parties on my side bar...do check them out.


Saturday, February 8, 2014

Gypsy Heart Necklace

Finished this little necklace the other day...


I have been pinning fiber art for jewelry for some time now and finally decide to try my hand at it....
True to my nature (and my budget) I wasn't about to buy anything new to make it.


 Of course I have a plenty of felted wool scraps laying around...and
I love the combination of green and pink...and with Valentines just around the corner...Well it just made sense to put them together!! 

 The lace came out of of sandwich bag full of vintage ribbon I picked up at a garage sale...
And of course the buttons are vintage too!!


I hand stitched a smaller heart on the back ...Can't leave it blank.  :)


So what do you think??  It was fin to make...but will it sell??
Denise
(Will probably link up to some of the priest on my side bar...they do rock!!)

Sunday, January 26, 2014

Fingerless Gloves for Valentines

Finished these gloves just in time for Valentines....
Not that I'm a big fan of Valentines Day (to sticky sweet for me) but I picked up this lovely pink sweater from GW...
and it was the perfect girly pink ...


So I cut out a felt heart and then cut it in half
and sewed them on the palms...


The lace came from a bag of ribbon and lace I picked up a a sale and was just just waiting for such a project!!  I cut two 3" pieces off ...
Gathered them in the middle and hand stitched them on.
Then stitched the hearts on top...
Finishing it off with a little vintage button.


I have to admit I'm kind-of loving on hearts right now...which is completely out of character...maybe I don't hate valentines as much as I thought.....but I still think it's a silly holiday!!

Denise
I will be posting to many of the parties on my side bar...so do check them out!  :)
PS:  I have started painting furniture again...so watch for some fun new projects!!

Friday, January 25, 2013

Lavender Heart Sachets for Valentines

Here is a quick and easy project to spiff your space up for Valentines Day plus give it a bit of a springy feel (and smell too).


First I made a pattern out of card stock....you remember...just like we did in grade school ...fold the paper in half and cut and then open it up.  :)
I then folded my fabric right sides together and then traced around the heart with a pencil.


Not wanting to sew and then have to turn the fabric inside out I choose to use my pinking sheers to cut out the hearts.I pinned them and added a ribbon on the inside for the ones I wanted to hang....on my cool white tree that I got for a dollar last summer....just had to brag a bit.  :)
Anyhow..


I sewed around the edges leaving a space open to add the stuffing...
Stuffed them with lavender seed and poly-fill...then sewed up the hole.

They seemed a little plain so I hand sewed a button on each side....Done!  :)


For the banner I simply cut slits to thread the ribbon through.


Here they are down in my space at Viking Village....


Just what it needed!


Told ya they were easy to make! 

(Will be linking up to many of those AWESOME link parties on my side bar)!

Denise

Saturday, January 28, 2012

Painting with Kids: Tree of Hearts


Here's a fun little Valentines project I did with the kids in my after school art class
(grades K-5)....


(Autumn helped me paint and plan this simple lesson)...

The first thing we did is paint the trunk...talking about how it is larger at the bottom or base and then gets smaller as it goes up.  I know this sounds basic but it isn't for them...even after the directions a couple of the younger kids still drew a very thick trunk with branches growing out the top.  


We also discussed how the branches grow in the same way...larger at the base where they are attached to the tree getting skinnier as they grow towards the sky.


Autumn painted most of her branches in before she add the hearts....


I painted my trunk and just a couple of the main branches and then started in on the hearts... adding the smaller branches later.


 For class we decide the best way to go, was to have the kids paint the trunk, large branches along with most of their smaller ones before they added the hearts.


I always give the kids a scrape piece of paper to blend colors on and I had them use it to practice painting hearts, getting my approval before they got to add any to their tree....This gave me the opportunity to work with the kids who were struggling.

Here are some AWESOME results.  :)


I love this picture (above) it is the perfect example of what I try to teach the kids, that when you think you made a mistake...Turn it into something great!  :)  Which is just what this student did!!....
Water color accidentally got splashed on her painting so she covered it up by adding more dots...brilliant!!!


Here are more trees...


each one as unique


and lovely...


as the child...


that painted it!!!


Well have a great week and
take some time to  volunteer at your school...
you will truly be amazed !!!

Denise

(I will yet again, be linking up to many of those parties in my side bar)

LinkWithin

Related Posts with Thumbnails

Autumn

Autumn
Autumn modeling a hat I knit for my etsy shop...What energy!!